} -->

Saturday 21 April 2018

YouTube Channel

If you are a fan over at my Facebook page then you will have seen some of the videos I have made about how I do various things.

It can be a bit tricky to find these videos when you're searching for a particular one so I decided to put them on my own YouTube Channel.

You can check out my current videos using the links below and don't forget to subscribe!

Also let me know if there is another particular video you would like me to do :-)


Like us on Facebook Follow us on Pinterest

Saturday 24 March 2018

Class Challenges


Usually on a Friday afternoon I allow my class to have an hour of finishing off time where students who had finished all their work would get free time. 

This worked great in my lower school classrooms where I knew students would be entertained  with blocks, lego, colouring and board games. 

But I didn't think that would work now I am in upper primary.


So I wanted something that would keep them occupied, not take too much prep on my part and be a nice way to end the week that students would look forward to.

I chose to do 'Minute to Win it' type challenges. 

I thought they would make the students use different parts of their brain, give everyone a chance to succeed and be a great bonding time for us all. Not to mention I thought it would end Fridays with a laugh!
We have assemblies every second Friday so we only do these class challenges on the other weeks.


Today I am going to share with you the challenges I have used this term and how I have adapted them for a whole class!

Block Stack

The first one we tried was seeing how many blocks (I used 2cm cubes) we could stack on the end of a pop stick. The catch is the pop stick has to be held in their mouth! I gave students a chance to practice before having some come up the front and see how many they could get in one minute (if it fell they could start again). 
Students were only allowed to nominate themselves for the final competition if they had achieved a certain amount during practice. I made this rule so that we weren't spending 29 minutes going through everyone. 
Our winner got 11!


Cookie Challenge

I really wanted to do the cookie challenge in my class. This is the one where you put the cookie on your face and have to get it into your mouth without using your arms. I didn't want to waste 30 cookies on the floor so I cut up 30 circles out of thick cardboard.
Some cardboard is really smooth so it helps to rough it up a bit using sandpaper of the side of your scissors.
I found that I had to tell students they couldn't use any part of their arm including their shoulders. I also found a couple of students had great reflexes and could toss the circle off of their forehead and catch it in their mouth. The next time I do this challenge I will definitely be stipulating it must travel down their face.

Paper Pick Up

Another simple one involved students using a straw to transfer small pieces of paper from one cup to another. We had a set practice time to test different methods out and then had whole class competitions. After one minute we counted how many they had transferred.

I found it was more of a challenge if you made them stand up to do it and had the paper pieces randomly mixed up (not nicely stacked up). The winner in our class managed 50 pieces.

Elephant Trunk

This challenge was definitely the one that made us laugh the most. Students had to put a stocking on their head (I bought a 4 pack for pretty cheap at Coles).
In one of the legs I had placed 2 brand new glue sticks to give it a bit of weight. The other leg was just wrapped around their head.I would have preferred a tennis ball in each but I couldn't get a hold of any that day.
I split the students up into 4 groups (If I had more stockings I would have done more groups but 4 still seemed to work nicely.)
We lined up 4 water bottles that were a quarter filled with water about 30cm apart. Students had to race the members of the other teams to be the first to knock down all their bottles. You could only use the end of your 'trunk' and no hands were allowed at any time.
Students had to knock them down in the correct order, for example if they accidentally knocked over the 2nd without having knocked over the first, the second would be stood back up. This prevented the bigger boys from just plowing down the middle and trying to take them all out with one almighty swing (which worked 50% of the time in one go).

I haven't had any issues with nits at this grade level but I did give the kids the option of wearing a hat underneath the stocking if they were at all concerned.


I hope you try some of these challenges out with your class and have a great time! Let me know if you have tried any others as I am on the hunt for challenges to use next term. 


Like us on Facebook Follow us on Pinterest

Saturday 10 February 2018

Classroom Tour 2018

Class Tour 2018


I am so happy with how my classroom turned out this year! 

Every year I feel like it looks better and better. 

While I try hard to make my classroom look good, I by no means think it is perfect or 'Pinterest worthy'. Firstly because I am at a school where most of the classrooms are looking their age so it is hard to make them look good and secondly I wouldn't want a 'perfect' classroom. I want student work on my walls, I want to create the classroom with them so I need to leave space for that. I also don't want the students to feel overwhelmed or spend a butt load of money on decorating.

We'll start with a few overview shots first and then go into some things in more detail.
^ View from the door

^ View looking back at the door. Used as the 'front of the class'.

^Back corner on door side

^Adjacent to the door- the traditional 'front of the classroom'.

You'll notice I have a rainbow theme in my class.  

When I had my first classroom I bought things that were cheap, cute and practical. I don't think Pinterest was really around back then and I was 3 hours away from any store remotely like Kmart. I kept collecting items in the following year and each time I got a new classroom there were different coloured walls, doors and chairs. I soon realised the only thing connecting all my items was that they were all different colours so a rainbow theme it was to be!

Let's take a closer look.


To the left of where you enter is my Birthday Chart, clock and T.V. screen. Beneath that I have a desk for putting miscellaneous items. The tray in the corner holds note to go home. 


Sorry about the glare on this picture. I love my birthday chart because it is so easy to make it fit any space, no matter the size!


Above the door I have my Welcome sign. It's in a weird place but I didn't have anywhere else to hang it. The top of the wall on this side is in need of a paint job so I have covered in up with things I probably wouldn't otherwise put up in a year 4/5 class. Here I have Days of the Week and Colour Words display.


I left the green cloth the previous teacher had up on this bulletin board and surrounded it with a tie dye rainbow boarder. The purple drapped over the window is from my wedding- it always helps to add a spot of colour to my classroom. Above that I have my punctuation posters. I am adding them as we cover each one so they are not all up yet.

In the back corner I have my Write Any Number Display- again mainly there for colour but I have seen the kids refer to it a number of times. 


Here is my desk with my beautiful spotted chairs that my mum helped me cover at the beginning of last year. 


My rainbow trays hold all my worksheets for the term with each draw labeled (with my FREE Rainbow Labels) as a subject from my timetable. I have a few items on top like my bells, stapler, sticky tape, hand sanitizer and highlighters.

I like to keep my desk simple. It has my laptop, ipad, magazine holder (with planning folders, assessment folders, clip board and guided reading folder), pen holder, sticky note pads, drink bottle and the item in the top left corner is my timetable for the week on display. 


I am trying a portrait timetable this term with Monday and Tuesday on one side and the others on the back. We will see how it goes. I like having it on display so its easy for me, EAs and relief teachers to see.


Behind the desk is a bookshelf that I am keeping quite a few things on. I am constantly moving things around (you'll notice the items in the above picture are not the same as some of the other pictures as this picture was taken at the end of last year as I was just moving in to the room) as I constantly tweak where things are to get the best location. 


Next to my desk is my FREE Goal setting chart. I will eventually add student names to it as we identify the areas they need to work on


In front of that I have my portfolio's of student work, a work to finish tray, guided reading books and our current gem jar reward system.


Continuing along this wall I have my two borrowing boxes. These are items students may borrow when needed. The black box holds the school ipads. Then we have a comprehension box that I use during literacy rotations (when I do guided reading).


Lastly along this wall I have our class library and then trays with scrap paper and a few other things that need labeling.

I have my rainbow curtains up but I've tied them up this year as it's a fairly dark room so even just having the sheer blinds hanging blocked out a lot of light.


I have signs to show students where to stack chairs. I mainly do this because I change my classroom around so much the chair stacks constantly move location so the signs help the students keep up.


I am still using the Raise a Number system (FREE from Little Lovely Leaders). I don't use the sharpen pencil one but it looks funny to leave it out.


My FREE Spelling Poster is also along this wall.


 I have my Multiplication Display above the whiteboard.


My Number of the Day Display is on the whiteboard so we can write the answers up when we go through them.


This is my reading groups display and my No Fuss Flip Calendar underneath.


My Job Wheel currently sits under my whiteboard as I haven't worked out where I want to hang it yet. I also think I need to redo it with slightly different jobs so that it will work better with older students.


Lastly, is probably one of my favourite parts of the room- my Weekly Timetable. Yes it takes up a lot of space, but you could always print it smaller to take up less room. I love that it lets students know exactly what we are doing and we only have to make minor adjustments to it each week. 

I hope you have enjoyed the tour of my 2018 classroom! If there is anything you would like to know more about feel free to let me know in the comments!


Like us on Facebook Follow us on Pinterest

Thursday 4 January 2018

FREE Australian Curriculum Term Planners for Years 1-6


A few years ago I started doing term planners. A place where I could record the main idea that I was going to cover for particular lesson each week.

 They have been such a HUGE time saver for me! 

I look at the Australian curriculum outcomes and pull out the big ideas. I sequence them in an order that works best and make sure I take into account what I have to report on and when.

Each week I have a new focus for each of my learning areas and in first term I like to try and cover as wide a scope as I can in terms of curriculum content while reviewing what they should have learnt in the previous grade.


Having a term planner makes my life soooo much easier when I go to do my weekly planners. It means I don’t have to keep referring back to the Australian Curriculum documents and waste time working out what content to cover each week.


Not all topics are explicitly planned out on my term planner. For some topics, like text types, HASS and Science I do unit planners as each lesson can differ a lot from one another. Where as the ones that are planned out in the term planner are lesson that tend to follow the same style each week or in the case of maths are so big and dependent on the student level that I am not able to plan them out more before the term has started.


I know the beginning of the year is CRAZY! (Who am I kidding- the whole year is CRAZY!)

So I thought I would give you term planners for years 1 to 6 FREE to help you off to a great start this year!

These planners are editable so you can change and tweak them as you need but we all know it is easier to go from something already started then to start from scratch.

Just click here to sign up to my newsletter and I will send you the link to Year 1 - 6! Including specific planners for composite classes of two year levels


  Like us on Facebook Follow us on Pinterest

Monday 25 September 2017

How to Leave Work On Time!

I get to work 30 minutes before the kids are allowed to begin entering the room (mostly just to get good parking). I leave ten minutes after the bell has gone and I rarely do work at home.

Today I'll show you how to do the same!


Control Your Mindset
The first one is your mindset!
As a teacher we can NEVER get EVERYTHING done! We can get a lot done and we can do an amazing job with whatever time we have, but we CANNOT do everything!
Our own lives and our families do not and should not have to suffer for our job.
In any job there is always MORE we COULD do. Once we accept this fact we'll be more content with what we do get done. We need to focus on the things that make the biggest differences and impacts.

Prioritise 
We need to focus on what will make the biggest differences and impacts on our students and prioritise those.
We also need to decide the priority of different aspects of our lives.
If I feel like I am behind I will work during my lunch hour (I say hour but its more like 35-40 minutes). I would rather lose time slowly eating my lunch or talking to my colleagues than lose time at home. Read more on prioritising here.

Maximise your Prep Time
I maximise my DOTT time (prep time). You can read all my tips on this in the blog post on Maximising Your Planning Time I did a while back, but in summary- plan out your planning time, don't get distracted by anything and have a schedule for each of your DOTT days. On Mondays I prepare reading groups and other weekly routine items that need changing out. On Tuesday I mark and file. On Wednesdays I plan for the following week and on Thursday I prep worksheets and resources and do photocopying. Knowing exactly what I am going to do and lumping things together saves SOOOO much time!


Get organised! 
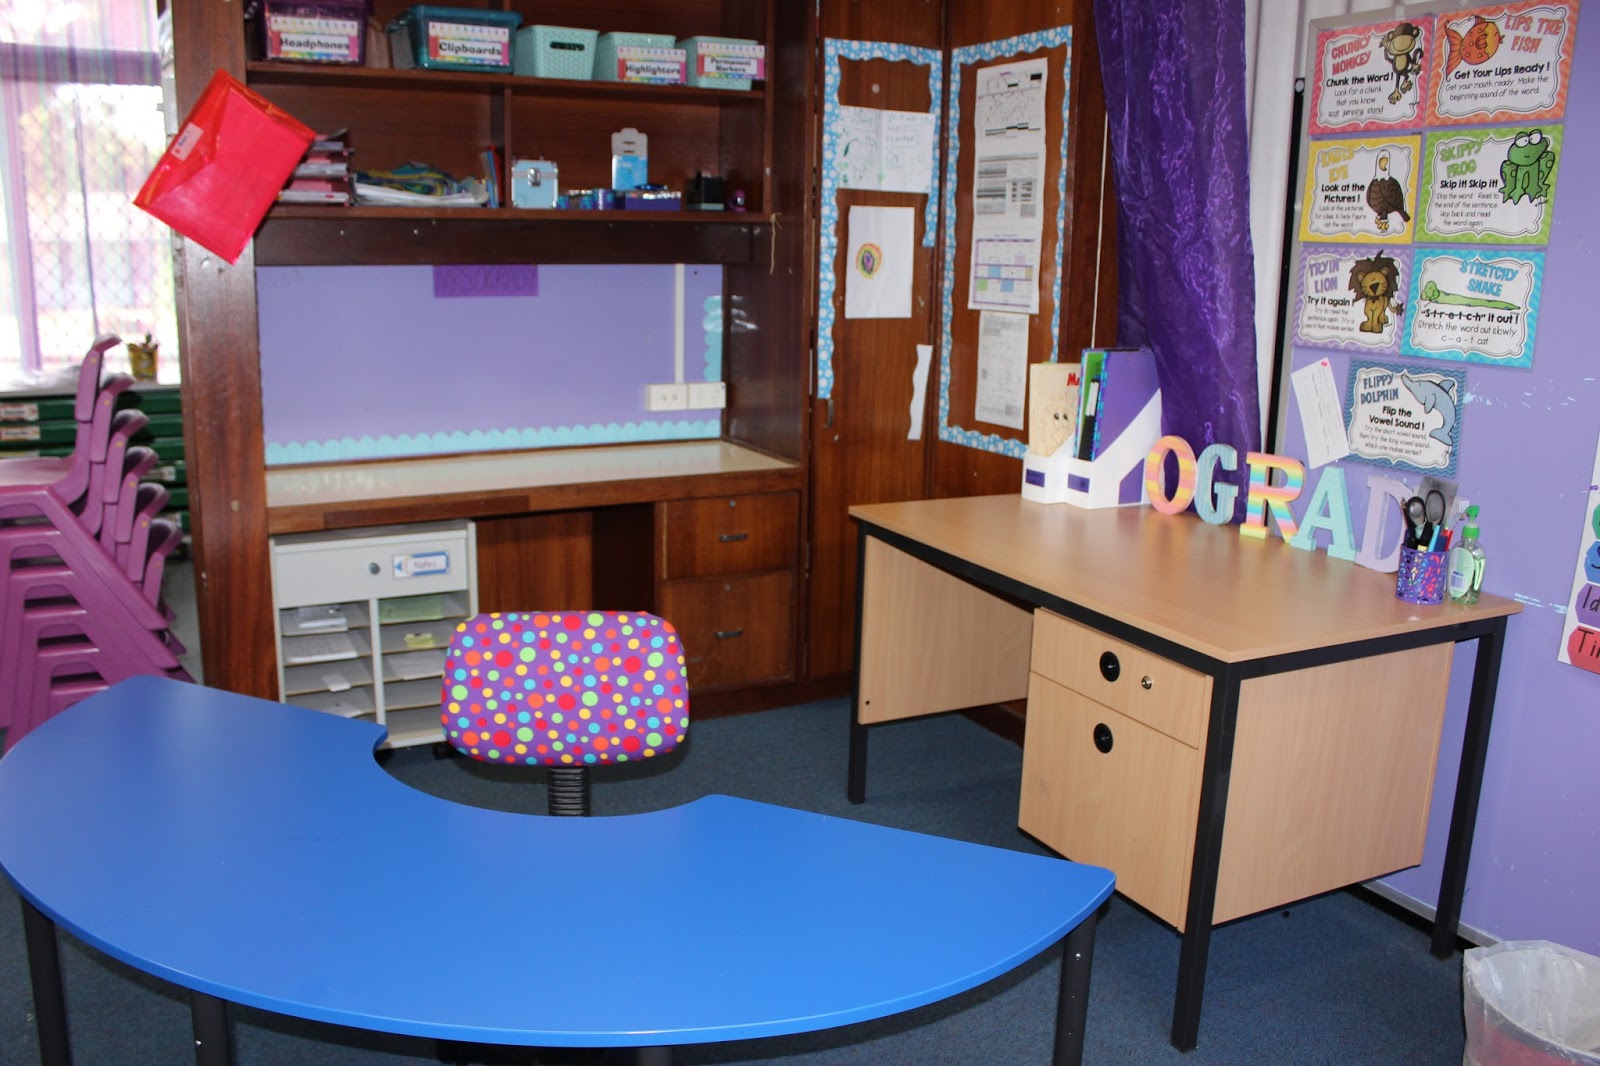
Set your classroom out in a way that works efficiently so that everything becomes easier.
For me that's a set of draws with all my items for the week, a place to put marking/items to be glued and items still in process, a clip board with assessments I am in the process of doing and a file with templates, a file with assessments and a file with all my planners and related resources ready to go.


Plan well! 
You can read my blog article here on my Planning Documents.
Plan out your term at the start and you won't have to spend time later wondering what to teach or constantly referring back to the curriculum.
You can still have room to alter things if the students take you in a different direction or have different needs but a good plan in place will help you know where you are heading.


Identify your weaknesses and strengths 
Find ways to use them to your advantage or work around them. If your weakness is coffee and you end up getting caught up in the staff room gossiping too much then consider having a kettle in your room.
If planning isn't your strong suit consider making your life easier and purchasing pre-planned units and work. If resource creating is too complicated or time consuming, search for the resource you need online.

I have planners for Years 1-6 for writing text types, Health, HASS and more. Check out my stores:
Teachers Pay Teachers
Designed By Teachers

If you have a strength in working with others consider team planning. You break up the lessons/subjects/units between your colleagues and then swap.


Cut Down your Marking
You don't need to mark every single error on every single piece of work!  Seriously, you don't!
If it isn't a specific writing task let spelling errors and missing punctuation go....the likelihood of students looking at them again is slim. The chance of parents looking at them is even slimmer.

Marking keys can make marking quicker, using stamps or a basic tick can also increase flow. I find it better to give students immediate verbal feedback on most things so I use my verbal feedback stamp. Some worksheets are pretty cut and dry so I just glance and stamp.
Get students to mark their own work at the end of the lesson if possible.


Not everything has to be assessed every day of every week- get a rotation going of what you are assessing to keep your workload down.

Optimise Small Chunks of Time
Set aside the last hour or half hour of the week for finishing off time for the students and YOU.
Use this time to finish things off like assessments while the students work on what they need to finish.

Make use of student down time to get things done. I have students tell news all on one day. That gives me a solid half an hour to do student writing conferences and mark their diaries. During silent reading I do one-on-one assessments such as running records.

Before school, do any last minute prep for the day.
Before leaving school ensure your classroom is clean. I do the bulk of the cleaning while my kids are packing and stacking. Learn to direct your students as you yourself are packing up. Organise your desk, put things back where they belong. An organised classroom means everything is easier to find and you don't waste time searching. If I have any extra time in the 10 minutes before I leave school then I do some quick tick marking from the day or get ahead on filing.


Start Jobs Early
When things are due such as reports, start on them early! Leaving them till the last minute will make you feel rushed and unprepared. Read more on Making Report Writing Easier here. 

Don't Reinvent the Wheel
If you are in your first few years of teaching you will naturally have to spend more time as you build up a repertoire of resources and plans. Stick in there, each year will get less and less time consuming! Make sure anything you make or plan is going to be useful and obtainable the following year.
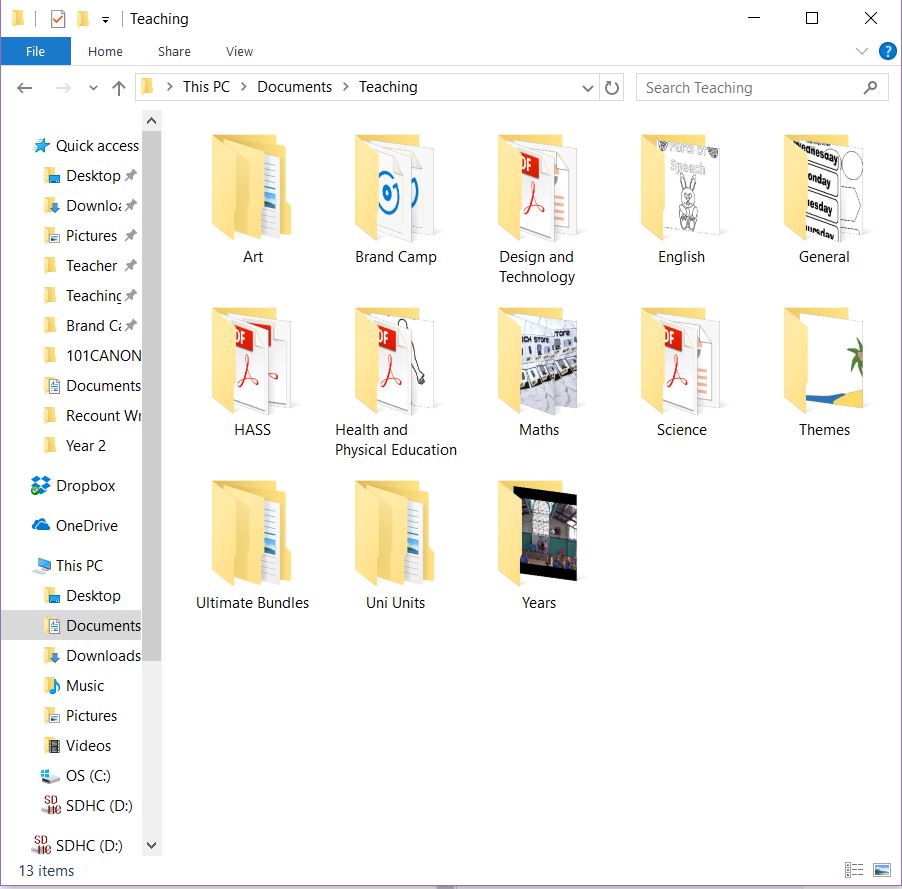
Make files on your computer for each subject and mini files within those. This also works for lever arch files and page protectors. Sometimes I go back looking for things from my weekly planners from my first year of teaching or resources I created then. I am often disappointed when I can't find something or my plans weren't detailed enough that I can't actually remember what I did.

So now you need to put all of this into action. Choose what you want to priorise, choose the times you would like to start and leave work and work out what actions you can put in place to get you there.
Try not staying back late for a week and see that the world doesn't tumble down!

Good luck!


 ⇨ Like us on Facebook ⇨ Follow us on Pinterest