} -->

Tuesday 20 December 2016

Sharing My Planning Templates

Recently people have been asking me to share my timetable and term planning templates that I showed in a previous blog post. Click here to read that post.

So here is a link to the term planner that you see below. Just delete the info you don't need and you're good to go. Click here.


.

Unfortunately, I don't give out editable copies of my unit planner template but check out my store to fine planners for many different year levels and subjects.

The documents will open up in an internet window. Click on the open button in the top right corner and select 'Open in Word 2016'. Make sure to save to your computer before you begin entering.

Make sure you join up to my email subscribers list where I send out a monthly newsletter featuring exclusive freebies and follow me on facebook for giveaways.
Like us on Facebook Follow us on Pinterest

Friday 18 November 2016

Top Tips for Teaching Drama

I have always used drama in my classroom. In fact, the first lesson I ever got to teach was a reader's theatre lesson. I ustilise drama in all my classrooms no matter the year level, relish when it my classes turn to do an assembly and have taught an extension group in upper school drama.
I have done most of my learning of teaching drama on the job through trial and error and today I am going to share my top tips for teaching drama with you. These tips can be applied to any classroom, age or skill level.

Top Tip 1: Have clearly defined rules. Repeat the drama rules each lesson and ensure students know exactly what is and isn't allowed. Drama lessons (like any lesson under The Arts umbrella) are known for easily getting out of control and as such many teachers shy away from them.
I always write my rules in the positive but it is important to go through what they do and do not look like in practice. If you ARE always trying your best then you ARE NOT crying or getting upset because you didn't get the character/story line/group that you wanted. If you ARE supporting your peers than you ARE NOT putting anyone down, mocking anyone or teasing.

Top Tip 2: Enforce the rules with an iron fist. This needs to be its own tip because this is where I went wrong when I taught my first drama unit. First the volume went up and up, then students started getting silly then everyone was off task and I was in a panicked, stressed out state. But when I think back, it always started with one student, who got a couple others off who then infected the whole class.It is like the very hard lesson all teachers have to learn where we have to be very strict in the first week to ensure a strong foundation and a good year.

Top Tip 3: Have a warm up and a warm down exercise. Having a clear end and beginning will help your students to switch between what is allowed in drama class and what isn't allowed in others subjects areas. It is also a great way to practice the basic skills of drama such as voice projection. Think of it like doing mental maths at the beginning of a maths lesson. 

Top Tip 4: Have a focus for each lesson.
 Drama can be a subject on its own or a tool utilised within another subject lesson but it should always have a focus. Drama should not be activities thrown together. They should link together to teach, practice or perfect skills. Such focuses could be movement, voice, characterisation, improvisation or emotion. If you are utilising drama as a tool within another area then ensure students will get out of the activity what you need.

Top Tip 5: Have a time for reflection. Drama is a very fun subject, A drama lesson can be filled with a lot of laughter, noise, excitement and applause. The focus of the lesson can be easily lost so it is important to reflect on what has been learnt or achieved at the end of the lesson. I prefer to do this after the warm down as students are generally more focused and more likely to retain what is being said.

Top Tip 6: Give EVERY student the same opportunity.
I am a shy person. In school I was the quiet one that you might almost forget was in your class. But come any drama activities I was an Oscar winning performer (okay maybe not that good....but one of the best in the class). Don't pigeon hole students. For some drama is their time to shine. Encourage all the students to have a go and some may surprise you.

Wednesday 9 November 2016

Report Writing/Informational Texts

Today I am going to share with you some of the activities from my Report Writing Units.

            Year 1 and 2                                        Year 5 and 6                                    Year 3 and 4

 I love to use the gradual release of responsibility model which sees students gradually having more control of writing .  I start off with showing them lots of texts and we do some text hunts.


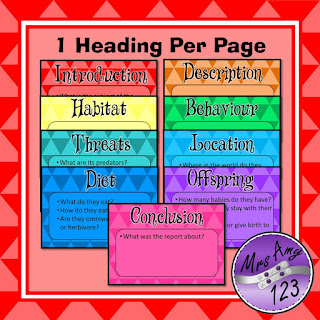
To do a text hunt have all the headings on small bits of paper and draw them out of the hat one at a time. Students need to locate the information, summarise and record. I start this activity in pairs with younger students and then repeat with another text with students working independently. This activity allows them to become familiar with the layout and headings of a report and practice their scanning and sumarising skills.

Then students begin piecing together the text. I give them a version with the headings separate and students glue them on. Then I give them one where they must write the headings themselves. Eventually I give them a completely jumbled text that they must workout the order and layout.


I then do a mid unit assessment but because I only want to assess the students ability to write the text time and not have their ability (or lack of) to research get in the way I get them to interview another student in the class and then write a report on that person. The students are always so engaged in this activity and it really shows their knowledge of a text type.


Next I get students to research a topic. I let every student pick their own topic to maximize engagement. The younger the students the more restrictive I am of where they can locate their information but I give older students the freedom to google websites. I like to give students prompts for what kinds of information to put under each heading.

Lastly, I let students present their report any way they like; posters, flip books, displays, book, presentation. A long as they can address the items in the rubric though their desired output.


Now I would like to share a few thing I DO NOT DO when teaching text types.

  1. I don't have the whole class researching the same topic at the same time and then write every sentence out as a class for them to copy and construct a report. This does not teach them anything except reliance on you, does not cater for anyone's diversity and the higher achieving students are not challenged.
  2.  I don't allow them to choose their own questions about a topic. If they have a specific question they want answered then they can include it in a did you know section. This used to be the big way to do it. You'd get students to develop questions then research it. This just created a world of mess as students would ask unrelated or too specific or unanswerable questions.
  3.  I don't allow students to type specific questions into google to find answers. I direct them to type in the topic and tap 'info for kids' on the end. This yields the best and most appropriate websites and then students read to locate information using the skills of they have learn about the construction of report text types
  4. I do not give students a template to write their final product in. I give them a blank retrieval chart for recording information (like the one above) and then they present the information how ever they would like, Giving a template restricts how much students can (or would otherwise) write. For the weaker student it makes their reports look empty and makes them feel like greater failures. It also does not give them the opportunity to think about layout including the use and layout of headings.
You can find all my report writing units by clicking here and I also have ones for persuasive, procedural, poetry and narrative writing for all year levels.


Monday 24 October 2016

Laminating 101 -The Guide You Must Read


What is it about laminating that makes us teachers like it so much? Is it the calming and relaxing nature of it? The sense of accomplishment? The way you can do it without much brain work? or maybe its just seeing how nice things look when they are laminated!

Lets go over the basics to an awesome laminating job!


The Machine:

I got my laminator almost a decade ago. I ummed and arghed about whether to get the more expensive A3 (that's poster size for my American friends) but it is a decision I have never regretted. Not only is it awesome for when I want to laminate larger items but it is also great for having a little more leeway when I put the sheet through. A slight angle isn't going to jam. My machine has only once jammed and it was totally human error. It has never overheated or stopped working.

There is a hack I see on Pinterest every now and again about using an iron to laminate. In a pinch this works fine but to get a good, even seal it takes four times as long. So if you laminate more than once a year a laminator is a good investment.

As I find laminting fun I prefer to laminate in the comfort of my own home while watching Netflix. It also means no time wasted at school waiting for the laminator to warm up or finding out someone else used it badly and now your colour print outs are ruined.

The Pouches:

I was oblivious to the following facts for many years because I would always look for the cheapest packs and not pay attention to anything else BUT there are actually several different types of laminating pouches other than your obvious different pouch size and quantity.

Firstly, you can get gloss or matte. I wish I had know this long ago when doing posters. Despite being more expensive, matte is better especially for posters being display on the wall where light sources vary. You can get away with gloss for student activities and of course certificates.
Secondly there is also different thicknesses. The thicker the pouch the more heavy duty your laminated items will be. I find 80 microns is sufficient for everything I do but I prefer 125 microns for durability. Make sure you check your machines manual as there is usually a limit to what each machine will take. I can't say I have a preference for brands, I just get what I can get when I need it.


Increased Durability:

If you want your items to really last and stand up to students bending, folding and constantly handle laminated items then ensure you leave a border around your items of clear laminate (see picture above). This will act as an extra seal (laminate sticks stronger to laminate then to paper) and you will find your items less likely to peel.
 The thicker the item the larger the border needs to be. If you look closely after you laminate an item you will see when the pouch has sealed. This also makes them waterproof so is great for desk name tags! Leaving a border is unnecessary on items like posters that won't be handled but I leave a border on these out of habit and it can be nice to pin/staple through the laminate then the actual poster.
Yes, this does mean you have to cut your items out twice, Yes, it will take longer but the items will last twice as long so in the end you save! On items that aren't handled often and only last one year you can easily get away with absolutely no border.
                                   

                                                Gluing:

Some laminating pouches have a slight stick to them to help items stay in place. To keep smaller items in place though, use a little clear glue and adhere them to the pouch. Just a small dab will work fine but keep the layer thin so that it doesn't affect your final product. This is great if using the above tip of having a border around all your items.


                                                Scissors:

Sometimes when laminating (especially in when doing prep for the first day back) you can be in a hurry, but always let the laminating sheet completely cool before cutting! This will ensure a nice, crisp, clean cut.
Use sharp scissors that have absolutely no sticky residue on them as this will cause nicks in your cuts. I actually have a dedicated pair of scissors for cutting paper and laminated items.
When cutting, never close the scissors complete to the end. Stop a few millimeters (eighth of an inch) before closed or this to can cause nicks and uneven cutting.
If you have a special cutting machine by all means use it but I don't recommend the school ones. You can't ensure the quality and what it has been used for previously. Any stickyness of bluntless will leave nicks and marks.  These not only look tacky, they can also cause injury and premature peeling!


                                                Corners:

Sharp edges can be dangerous but if the items I am laminating have pointed corners then I leave them pointed to match. Where I can though I  do love to use rounded corners for a polished look but I do them on both the item when I making them. You can get stampers that cut rounded corners, you can find them in the photo album section.


                                              The obvious:

  • Always stick the sealed edge into the laminator first. 
  • You must use a whole sheet and can't save piece of the pouch to laminate later. This will cause jamming. 
  • Ensure you give the laminating the full amount of time to warm up before you begin laminating. If your laminator is like mine then it won't start spooling until it is completely warmed up.
Well that's everything I know about laminating....Now I have a real craving to laminate something...
The resource I was laminating in some of the pictures above was my Grouping Cards. 


Thursday 6 October 2016

Teaching Fire Safety


With fire prevention week just around the corner for those in the U.S of A I thought I would share with you some of the activity ideas from my Fire Safety Unit.


This cute burning building activity is a very engaging way to get students to remember key fire safety tips like 'stop, drop and roll' and call '000/911'. They love making and decorating the building and it makes a great display!

It is important whenever possible to make lessons real world based. Have students draw their house (as best as their memories will allow) and plan their own escape routes. I use a worksheet first so students can focus on escape routes and then they draw their own house on the back.


I use this as an unit assessment piece and have students write what they remember according to the prompts. I have a marking rubric in my unit below. The firemen look gorgeous up on the wall.

Making a word wall with your class can be loads of fun. Have students brainstorm words and write them on cards with students drawing pictures to explain them. Alternatively you can purchase my word wall that can be made into a fire station!

Labeling parts of a fire truck is engaging while students learn the technical names for various features. 


This activity involves students stating what fire fighters are (nouns/adjectives) what they can do (verbs) and what they have/use (nouns). It is great for brainstorming at the beginning of a fire safety.


To prepare for the Fire Flow Chart activity students each get a turn to roll play waking up to a fire alarm. They must choose the actions they would take given a continuing scenario from the teacher including consequences for dangerous actions. If the student puts their hand on the door knob before feeling for heat then they might get burnt. Sometimes the door will have a fire behind it and they may have to go through the window instead. Try and make every student have a slightly different scenario until you have exhausted every possibility including staying in their room waiting for the fire fighters to come in. Allow them to move around the classroom and use the door/objects and windows to make the scenario as real as possible. If the student makes a mistake it is the next students go just to keep the activity fast moving. After everyone has had a go allow students to complete the flow chart!


You can find all the activities mentioned and more in my Fire Safety Unit.

You might also like these Fire Safety Barrier Games.

Monday 12 September 2016

The 10 Things I like LEAST about school!


Last week I shared with you The Ten Things I Miss Most About Teaching while I am on maternity leave. This week I am sharing the ten things I don't miss....
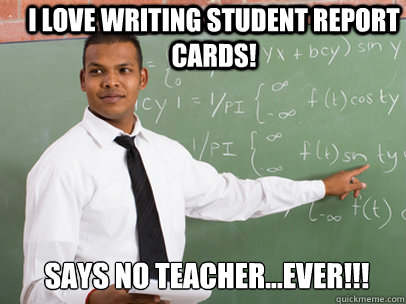
1. Report Writing
Image result for teacher report writing memes

2. The Parents
Image result for teacher parent meme
Image result for school admin memes
Image result for teacher waiting to call parents

3. Student's Backgrounds
Image result for only smile they see all day

4. Admin 

Image result for called to the principals office meme
Image result for school admin meme

5. Department Interference

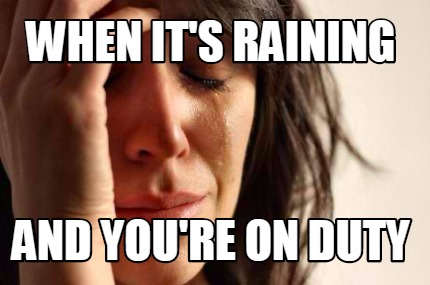
6. Duty during bad weather

7. Temperature control restrictions
cold jack 2 - waiting for admin permission to turn the heater on

8. School Photos
unhappy crying baby - school photo  day again

9. Teaching classroom routines 
Image result for classroom meme routines
10. Saying Goodbye to another group of kids at the end of the year.
Image result for goodbye teacher meme